Knowing how to clean a coffeemaker is essential for maintaining its performance and ensuring every cup tastes fresh and delicious. Over time, mineral deposits, coffee oils, and residue can build up, affecting flavor and even causing machine malfunctions. Regular coffeemaker cleaning not only extends your machine’s lifespan but also enhances the quality of your brew. In this comprehensive guide, we’ll walk you through step-by-step instructions on how to clean a coffeemaker, covering drip, single-serve, and espresso models. We’ll also share coffeemaker maintenance tips, coffeemaker troubleshooting advice, and coffeemaker safety precautions to keep your brewing routine flawless. For more expert tips, check out our coffee guide.
Why Cleaning Your Coffeemaker Matters
A dirty coffeemaker can lead to bitter or off-tasting coffee, slow brewing, or even clogs that require coffeemaker troubleshooting. Hard water minerals like calcium and magnesium form limescale, while coffee oils and grounds leave residue that affects flavor. Regular coffeemaker cleaning prevents these issues, ensuring consistent brews and maintaining your machine’s efficiency. Whether you own a budget drip model, a pod-based single-serve, or a high-end espresso machine, mastering how to clean a coffeemaker is key to a great coffee experience. Plus, it’s a simple process that fits into any coffeemaker maintenance routine, saving you from costly repairs.
How Often Should You Clean Your Coffeemaker?
The frequency of coffeemaker cleaning depends on usage and water hardness:
- Daily: Rinse removable parts like the carafe, filter basket, and reservoir after each use to remove grounds and oils.
- Weekly: Deep-clean detachable components with soap and water to prevent buildup.
- Monthly: Descale with a vinegar solution or commercial descaler to remove mineral deposits, especially in hard water areas.
- Every 3–6 Months: Perform a thorough cleaning, including internal tubes and filters, to maintain peak performance.
Check your manual for model-specific advice, as some machines have cleaning indicators. For example, Keurig’s “Descale” light signals when it’s time for a deep clean. Consistent coffeemaker maintenance keeps your machine running smoothly.
General Steps for How to Clean a Coffeemaker
Most coffeemakers follow a similar cleaning process, whether drip, pod, or espresso. Here’s a universal guide to how to clean a coffeemaker, with specific adjustments for different types later.
Step 1: Gather Supplies
You’ll need:
- White vinegar or a commercial descaling solution.
- Filtered water (to avoid adding more minerals).
- Mild dish soap.
- A soft sponge or cloth.
- A small brush (for tight spots like filter baskets).
Step 2: Empty and Rinse Components
- Unplug the coffeemaker for coffeemaker safety.
- Remove the carafe, filter basket, and reservoir (if detachable). Empty any grounds or pods.
- Rinse parts with warm water and mild dish soap. Use a brush for stubborn residue in baskets or spouts.
Step 3: Descale the Machine
- Mix a solution of 1:1 white vinegar and water (e.g., 2 cups each for a 12-cup machine).
- Fill the reservoir with the solution and place the carafe back.
- Run a brew cycle without coffee grounds. For pod machines, run without a pod.
- Let the solution sit for 15–30 minutes to break down limescale.
Step 4: Flush the System
- Empty the carafe and refill the reservoir with clean water.
- Run 2–3 water-only cycles to remove vinegar taste or residue.
- Repeat if a vinegar smell persists.
Step 5: Clean Exterior and Reassemble
- Wipe the machine’s exterior with a damp cloth, avoiding electrical components.
- Reassemble parts once dry and run a final water cycle to ensure cleanliness.
Model-Specific Cleaning Tips
Different coffeemaker types require tailored approaches. Here’s how to clean popular models, ensuring you master how to clean a coffeemaker for your specific machine.
1. Drip Coffeemakers (e.g., Braun BrewSense, Ninja CE251)
Drip machines like the Braun or Ninja are prone to limescale in the heating element. Follow the general steps above, but note:
- Filter Basket: Remove and soak the basket in soapy water. Scrub mesh or paper filter holders to clear oils.
- Carafe Care: For glass carafes, use a soft sponge to avoid scratches. Thermal carafes may need a bottle brush for deep cleaning.
- Descaling Frequency: Monthly descaling is critical, especially if your machine has a “Clean” light (e.g., Cuisinart). Press the “Clean” button to initiate a cleaning cycle after adding vinegar solution.
For persistent clogs, check the showerhead for blockages during coffeemaker troubleshooting.
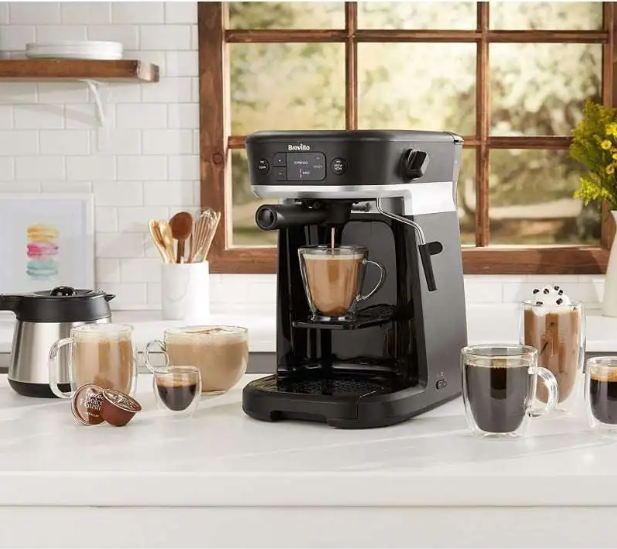
2. Single-Serve Pod Machines (e.g., Keurig, Nespresso)
Pod machines like Keurig or Nespresso require special attention to internal needles and pod holders:
- Needle Cleaning: Use a paperclip or Keurig’s cleaning tool to clear the entry and exit needles. Remove pod residue carefully.
- Pod Compartment: Wipe the pod holder with a damp cloth after each use. Soak in vinegar for tough stains.
- Descaling: Keurig recommends descaling every 3 months. Use Keurig’s descaling solution or vinegar, running 8oz cycles until the reservoir is empty. Nespresso Vertuo models need a descaling kit; press the button three times rapidly to start the cleaning mode.
- Water Tank: Detach and wash with soap weekly to prevent mold.
Run extra water cycles for pod machines to ensure no descaler lingers, preserving the flavor of your next brew.
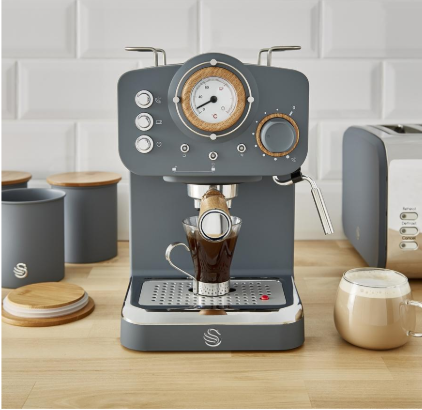
3. Espresso Machines (e.g., Breville Barista Express)
Espresso machines have complex components like portafilters and steam wands, requiring meticulous cleaning:
- Portafilter and Group Head: Remove the portafilter and rinse after each use. Wipe the group head with a damp cloth to remove grounds.
- Steam Wand: Purge the wand after frothing milk, then wipe and soak in warm water to clear milk residue.
- Descaling: Use a commercial descaler every 2–3 months, as vinegar can damage seals. Follow Breville’s descaling mode instructions.
- Drip Tray: Empty and clean daily to prevent mold.
Espresso machines benefit from backflushing with a cleaning tablet monthly for thorough coffeemaker maintenance.
4. Portable Coffeemakers
Portable coffeemaker models, like battery-powered or travel-sized drip machines, are simpler but still need care:
- Compact Parts: Rinse small reservoirs and filter baskets after use. Avoid soap if parts aren’t detachable.
- Descaling: Use less vinegar solution (e.g., 1:2 ratio) due to smaller tanks. Run multiple water cycles.
- Storage: Dry thoroughly before storing to prevent mold, ideal for travel setups.
Coffeemaker Troubleshooting: Cleaning-Related Issues
Cleaning can resolve many common issues, but sometimes coffeemaker troubleshooting is needed post-cleaning:
- Slow Brewing: Persistent limescale may remain; run an extra descaling cycle or check for clogged tubes.
- Bitter Coffee: Old oils may linger. Clean the filter basket thoroughly and use fresh grounds.
- Leaks: Ensure the reservoir is properly seated. Check seals for wear during cleaning.
- Vinegar Smell: Run additional water cycles (3–4) to flush out descaling solution.
If problems persist, reset the machine by unplugging for 10–15 minutes. For more fixes, visit our brewing tips.
Coffeemaker Safety Tips for Cleaning
Cleaning a coffeemaker involves hot water and electrical components, so prioritize coffeemaker safety:
- Unplug Before Cleaning: Disconnect the machine to avoid shocks.
- Avoid Submersion: Never immerse the main unit in water; wipe only with a damp cloth.
- Handle Hot Parts Carefully: Let carafes or steam wands cool before cleaning to prevent burns.
- Use Safe Solutions: Stick to vinegar or manufacturer-approved descalers to avoid damaging internals.
- Stable Surface: Place the coffeemaker on a flat counter to prevent tipping during cleaning.
These precautions ensure safe and effective coffeemaker cleaning.
Coffeemaker Tips for Optimal Cleaning Results
Elevate your how to clean a coffeemaker routine with these coffeemaker tips:
- Use Filtered Water: Reduces mineral buildup, minimizing descaling frequency.
- Check Water Hardness: In hard water areas, descale every 2–3 weeks instead of monthly.
- Store Properly: Keep parts dry and assembled loosely to avoid mold, especially for portable coffeemaker models.
- Replace Filters: Swap water or coffee filters every 3 months for optimal performance.
- Monitor Taste: If coffee tastes off, clean immediately to restore flavor.
Alternative Cleaning Solutions
If vinegar isn’t available, try these options:
- Commercial Descalers: Brands like Keurig or Breville offer solutions tailored to their machines.
- Citric Acid: Mix 1 tablespoon with 4 cups of water for a gentler descaling alternative.
- Baking Soda: Use sparingly for external stains or carafe cleaning, but avoid internals to prevent residue.
Always follow with water cycles to rinse thoroughly, ensuring no impact on how to brew coffee in a coffeemaker.
Conclusion: Keep Your Coffeemaker Spotless for Perfect Brews
Mastering how to clean a coffeemaker is a game-changer for coffee lovers, ensuring every cup is fresh and flavorful. By following our step-by-step guide—whether for drip, pod, or espresso machines—you’ll keep your coffeemaker in top shape with minimal effort. Regular coffeemaker cleaning and coffeemaker maintenance prevent issues like clogs or off-flavors, while coffeemaker safety practices protect you and your machine. From daily rinses to monthly descaling, these habits extend your coffeemaker’s life and enhance your brewing experience. For more expert advice or to explore top models, visit coffeemakert.com and brew better today!